Migration/Hardware Replacement
This page demonstrates how you can configure Ozeki NG SMS Gateway to keep your settings in case of migration or hardware replacement. If you follow the steps below you can easily configure your SMS gateway to operate on another computer or under another operation system with the same settings you had before.
Introduction
This page will provide you helpful instructions for cases
when you need to
migrate your Ozeki NG SMS Gateway to another computer or you replace or reinstall
your operation system and you want to keep your settings in your Ozeki NG SMS
Gateway. If you follow these steps you can achieve that after a migration of your
Ozeki NG SMS Gateway, all the configuration will remain the same on the
destination computer. In this way you do not need to start all the configuration
process from the beginning as all of your service provider connections and users
will be kept.
So if you want to migrate Ozeki NG SMS Gateway from Computer "A" to Computer "B"
you need to download and install Ozeki NG SMS Gateway to Computer "B". After you
stop the service, you need to copy "Users" and "Config" folders from Computer
"A" to Computer "B". Finally, you just need to start service and you can use
the SMS gateway with your original settings (Figure 1).
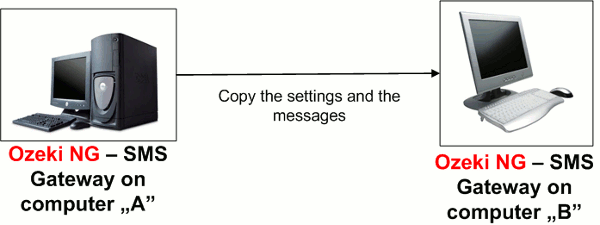
Configuration steps
Please note that in the configuration guide Computer "A" stands for the source computer from which you want to migrate Ozeki NG SMS Gateway; and Computer "B" stands for the destination computer to which you wish to migrate Ozeki NG SMS.
Computer "B": First you need to download the setup folder of Ozeki NG SMS Gateway to Computer "B" and start to install it (Figure 2).
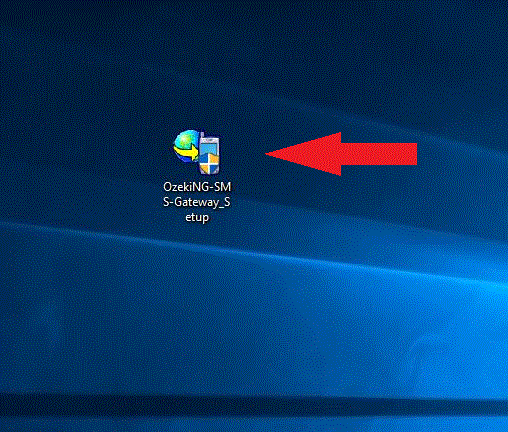
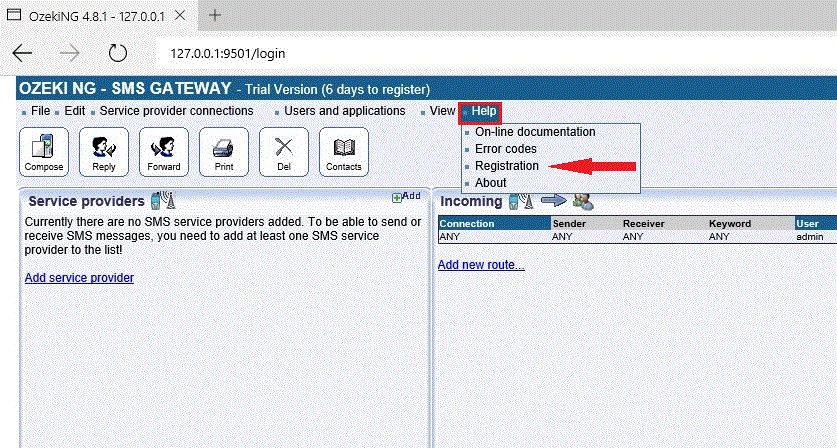
Computer "B": Login, and go to "Help" menu. Select "Registration" menu item (Figure 3).
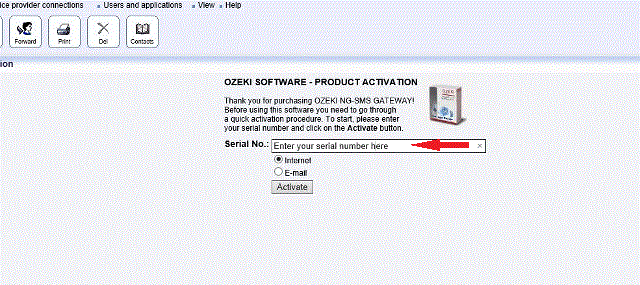
Computer "B": Enter your serial number and click on "Activate" (Figure 4).
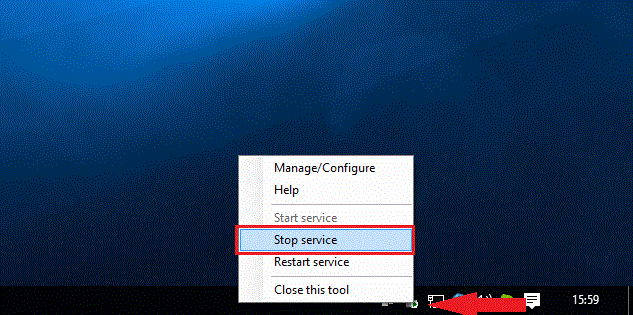
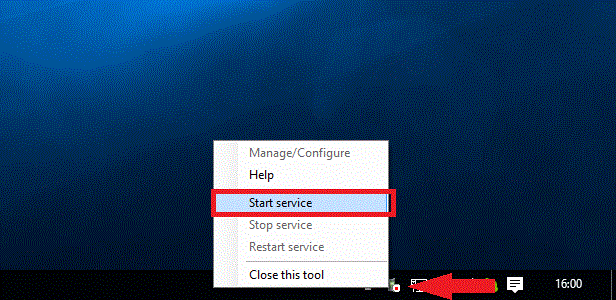
Computer "B": Now right click at the service monitor of Ozeki NG SMS Gateway and select "Stop service" option (Figure 5).
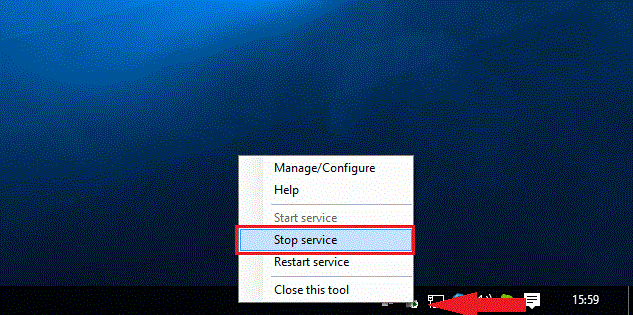
Computer "A": Stop service at Computer "A", as well (Figure 6).
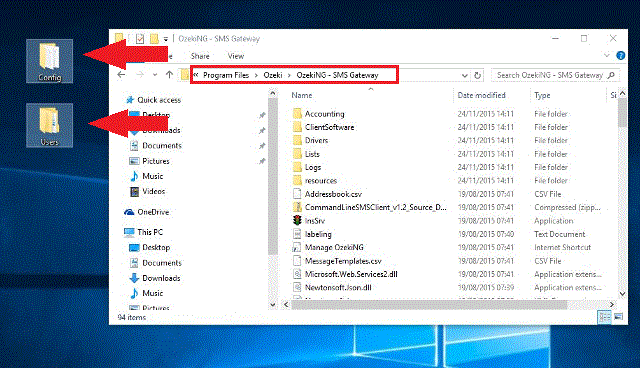
Computer "A": Go to the directory of Ozeki NG SMS Gateway and copy "Users" and "Config" (Figure 7).
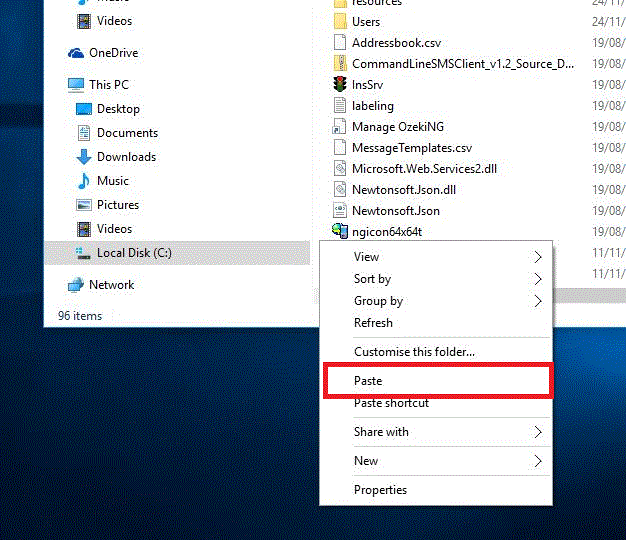
Computer "B": Then paste "Users" and "Config" folders to Computer "B" (Figure 8).
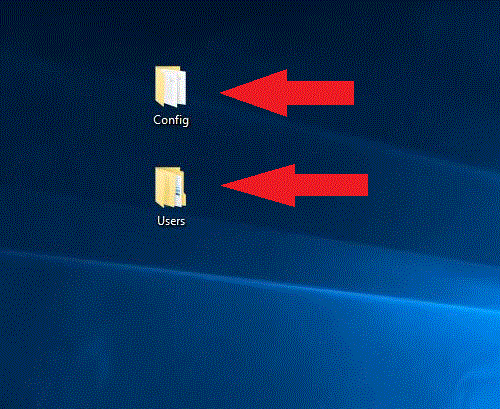
Computer "B": Right click on the folders and select "Cut" (Figure 9).
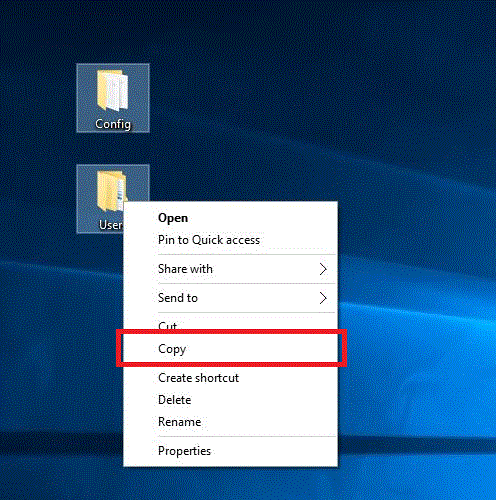
Computer "B": Go to the directory of Ozeki NG SMS Gateway (Figure 10).
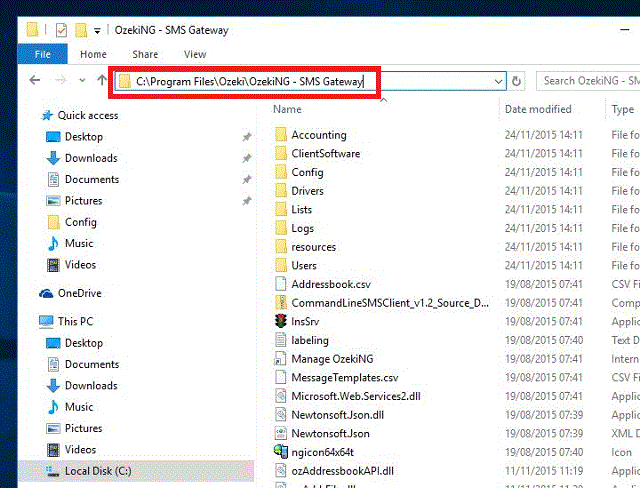
Computer "B": Paste the two folders into the directory of Ozeki NG SMS Gateway (Figure 11).
Computer "B": Now you can start Ozeki NG service (Figure 12).
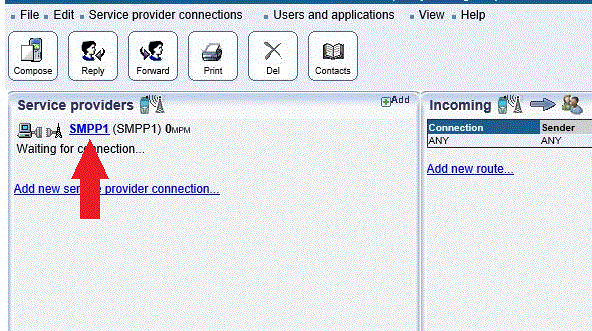
Computer "B": As you can see, the SMPP connection that has been configured at Computer "A", has the same configuration settings at Computer "B" after the migration (Figure 13).
If you have any further question regarding this topic, please send an e-mail to info @ ozekisms.com e-mail address.
Read how you can connect your
SMS gateway to the mobile network
If you have not downloaded Ozeki NG SMS Gateway
you can do it right now
