HTTPS
The Graphical User Interface of the Ozeki NG SMS Gateway can be accessed through HTTPS. All you need to do is to configure an HTTPS port on the server preferences form, then you should assign a HTTP Server certificate to the HTTPS port. In this article you can get a detailed description about how you can setup HTTPS in your Ozeki NG SMS Gateway.
Ozeki NG SMS Gateway software is prepared for handling HTTPS connections. In order for this to work, a certificate is needed (generated or purchased as Thawte, GoDaddy, etc.)
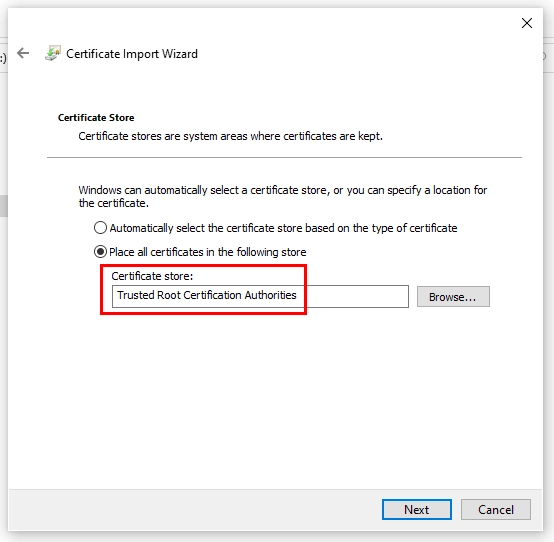
In case you are using a generated certificate, you need to install the generated certificate to Thrusted Root Certificate storage on ALL computers from which you wish to connect to Ozeki NG SMS Gateway software through HTTPS connection.
Use the following step by step description to configure the HTTPS for your Ozeki NG SMS Gateway:
Step 1) Download and unwrap this .zip file to a folder, for instance c:\https_ngsms
Step 2) Start a command line with system administartor rights. Please click on Start menu, Search. Here, please type cmd. In the list that appears, please right click on cmd and choose Run as system administrator option.
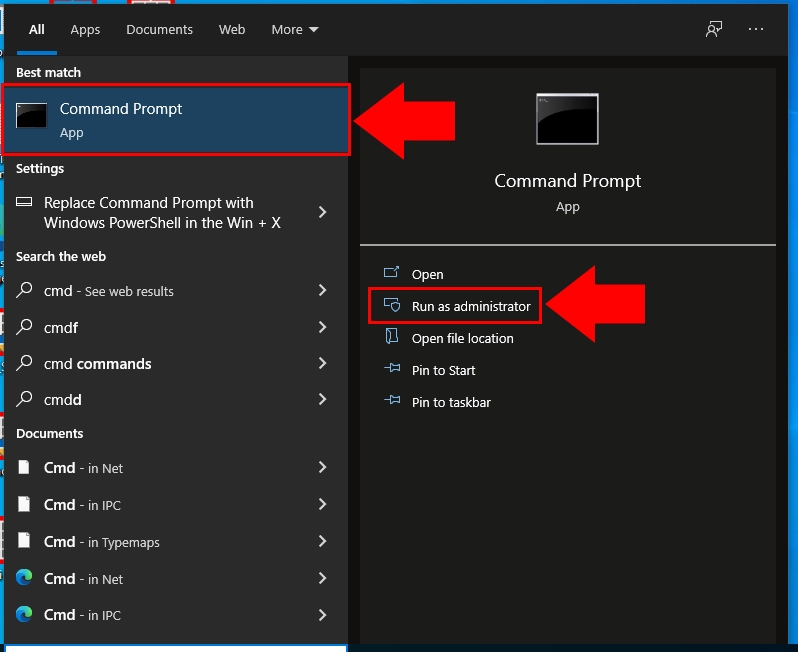
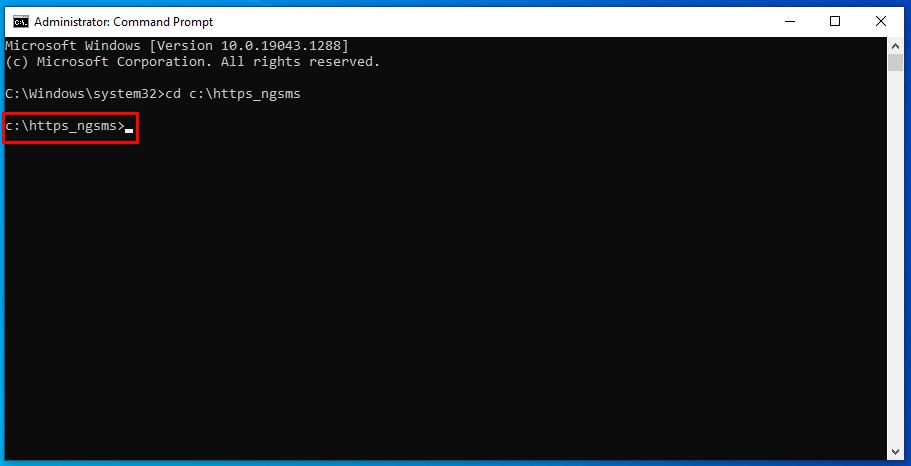
Step 3) Find the folder in command line where you unzipped the attached .zip file.
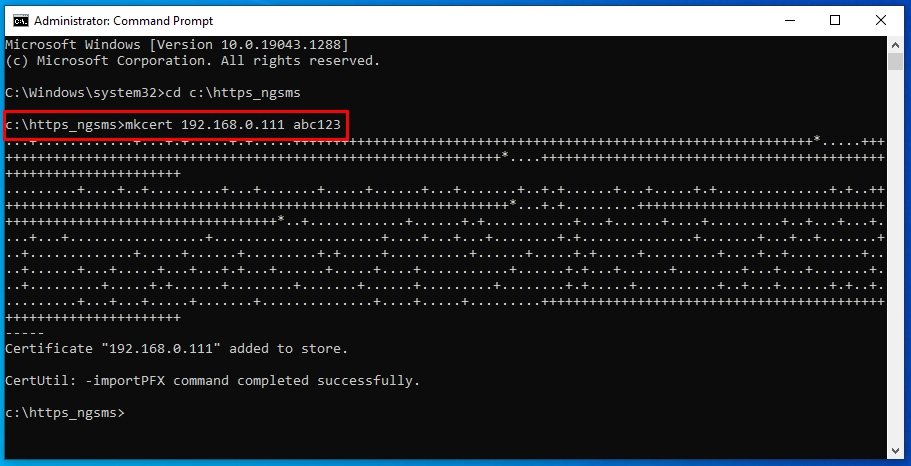
Step 4) Please run mkcert.cmd command in a way that you give your computer's IP address, where you wish to be reached through HTTPS, as parameter 1 and the password for the certificate as parameter 2 in the following way:
mkcert ng_computer_ip_address password
Step 5) Run HttpConfig.exe as admin.
Step 6) In the window that appears, please click on SSL tab.
Step 7) Click on 'Add'.
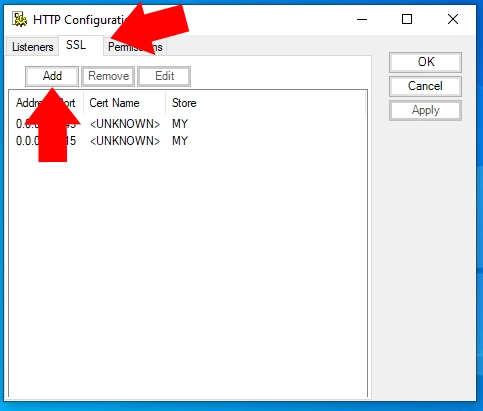
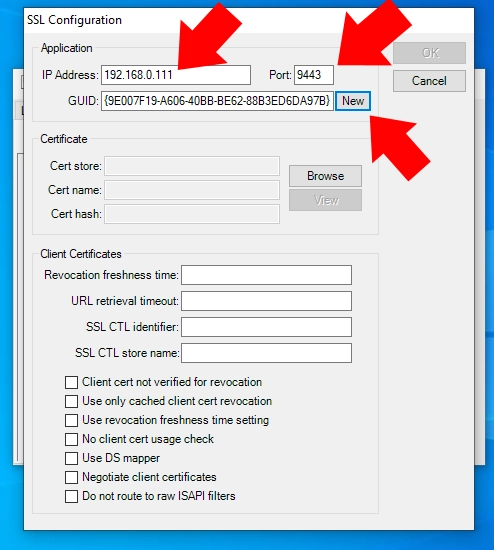
Step 8) In the window that appears, to IP address field, please add the computer's IP address where Ozeki NG SMS Gateway software is running. To port field, please add the port number through which HTTPS will watch.
Step 9) Next to GUID field, please click on 'New' button.
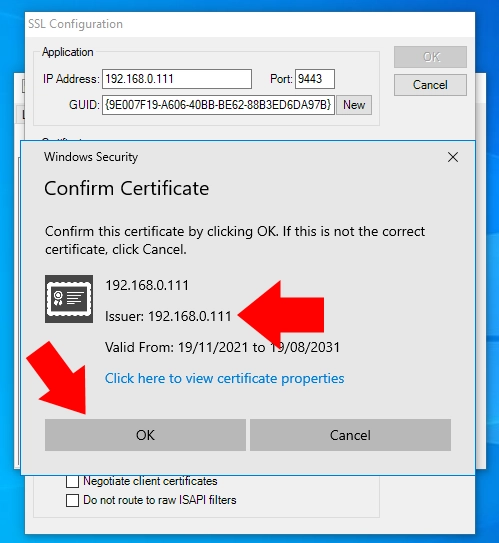
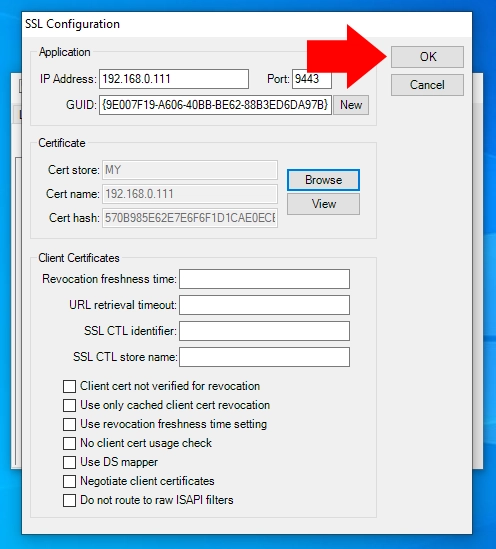
Step 10) In Certificate section, please click on 'Browse'. From the list that appears, please select the certificate that was created by ngsms-CA, then click on 'OK'.
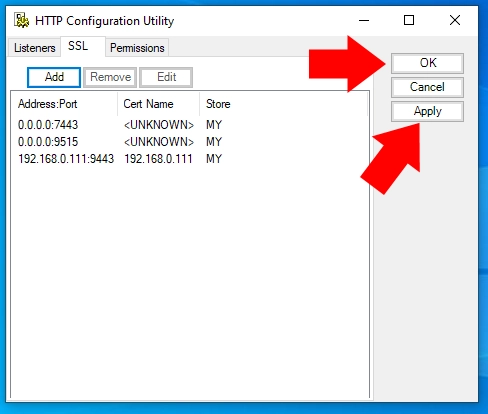
Step 11) Click on 'OK', following this, please click on 'Apply' and then on 'OK' again.
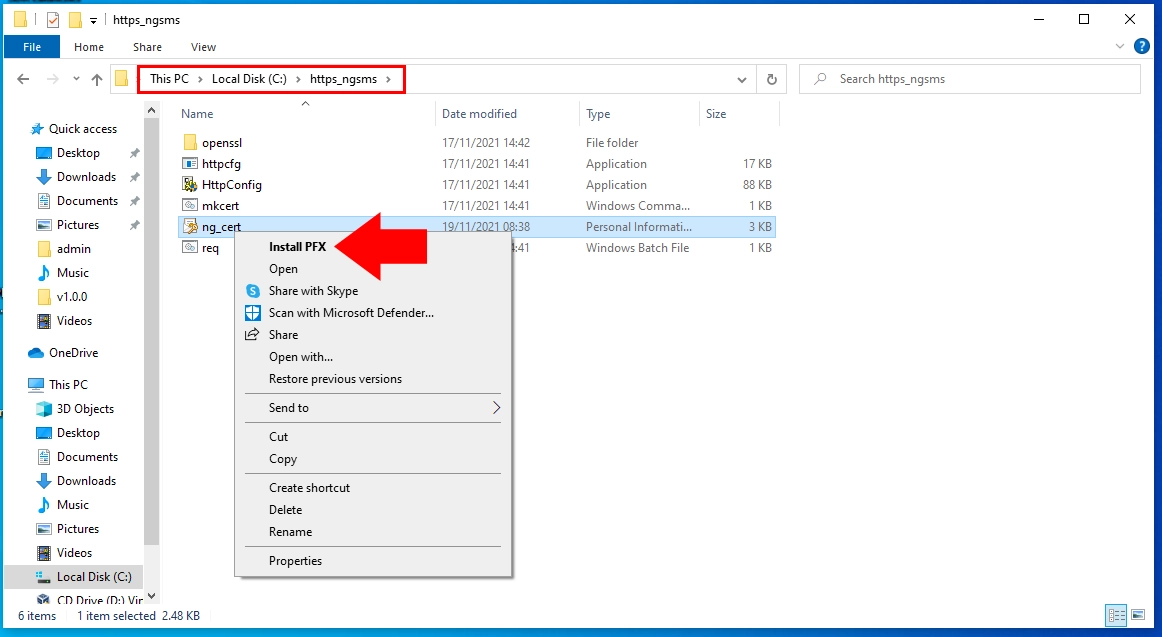
Step 12) In the folder, where you ran mkcert and HttpConfig, an ngsms.cer file was created. Please install this to Thrusted Root Certificates.
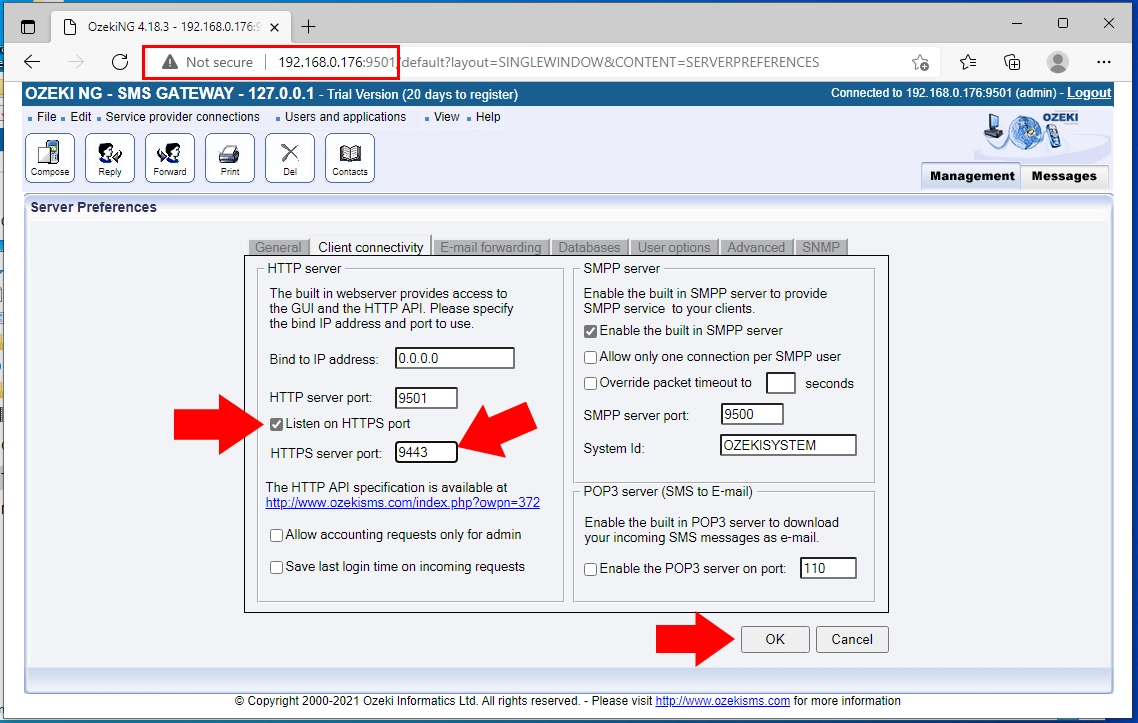
Step 13) Open the user inteface of Ozeki NG SMS Gateway, in Edit menu, Server preferences menu item, on Client Connectivity tab, please check 'Listen on HTTPS port' checkbox. Following this, please add the port number where you have installed the certificate to 'HTTPS server port' field.
Step 14) Restart Ozeki NG service.
Step 15) Type the computer's IP address and the HTTP port where Ozeki NG SMS Gateway is running to the browser in the following way: https://ng_computer_ip_address:https_port/
Step 16) Login with username and password.
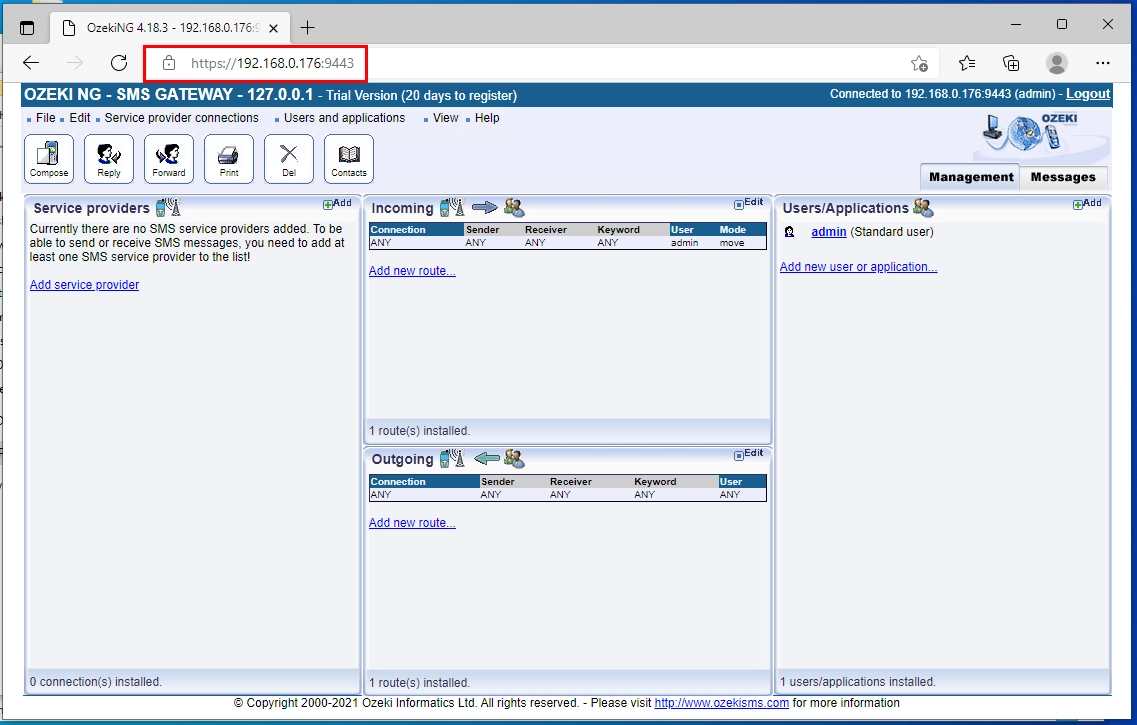
After you have configured these settings you can access to your Ozeki NG SMS Gateway through HTTPS.
If you have any question, please contact us at info@ozekisms.com.
More information
- Download Information
- Product Manual
- Installation Guide of the Ozeki SMS Gateway
- Storing great numbers of SMS messages in system database
- SMS Service provider connections
- Users and SMS applications
- Developers guide
- Examples and SMS solutions
- Appendix
- FAQ
- SMS Gateway feature list for system developers and operators

 Sign in